Durability of the floor in a garage building involves a lot of planning, the right materials, and expertise. Site preparation and excavation to pouring, levelling, and curing of the concrete, everything is required to have a strong and long-lasting slab. Poor quality, cracking, and durability are the issues of concern to many property owners, yet 5JD Construction offers qualified advice and quality services, which guarantee an easy, secure, and flawless Concrete slab construction for your garage floor finish that is both effective and pleasing to the eye.
Concrete Slab Construction: Step-by-Step Guide for Garage Floors
The proper construction of the garage floor needs planning, preparation and implementation. Every process, including site assessment and excavation, pouring, finishing, and curing, will result in a long-lasting, level, and durable slab of concrete.
Here is your Concrete slab construction’s step-by-step guide:
- Step 1: Site Preparation and Planning
Concrete Slab Construction begins with assessing the garage location and removing grass, debris, and topsoil. The slab space is clearly defined using stakes and string, maintaining the proper slope for drainage, taking accurate measurements, and creating an organized layout to guide the construction process.
- Step 2: Excavation and Subgrade Preparation
During Concrete Slab Construction in Celina, TX, the marked area is excavated to the required depth, typically 4–8 inches depending on the load. The soil is compacted to create a smooth, consistent subgrade, preventing settling, cracking, and other issues in the finished concrete slab.
- Step 3: Installing a Gravel Base
In Concrete Slab Construction, a 3–4 inch layer of gravel or crushed stone is spread over the compacted soil. It is packed tightly to improve drainage, provide stability, and create a solid base for the concrete, ensuring long-term durability.
- Step 4: Installing Formwork
During Concrete Slab Construction, the shape of the slab is marked by setting up wooden or metal forms around the perimeter. The forms should be flat, straight, and securely anchored to keep the concrete in place during pouring and curing, ensuring clean and precise edges.
- Step 5: Placing Reinforcement
In Concrete Slab Construction, the forms are reinforced by installing steel rebar or wire mesh. It is positioned slightly above the gravel using spacers to stabilize the slab, prevent cracking under heavy loads, and create a durable garage floor that lasts for many years.
- Step 6: Mixing and Pouring Concrete
During Concrete Slab Construction, concrete is prepared according to specifications or ready-mix concrete is delivered as ordered. It is poured evenly into the forms, reaching all corners and edges, and then vibrated or tamped to remove air bubbles and create a level, solid base.
- Step 7: Screeding the Surface
With a screwdriver, smooth the concrete until there is nothing left over. This keeps the slab flat and even and prepares the slab to be floated and finished.
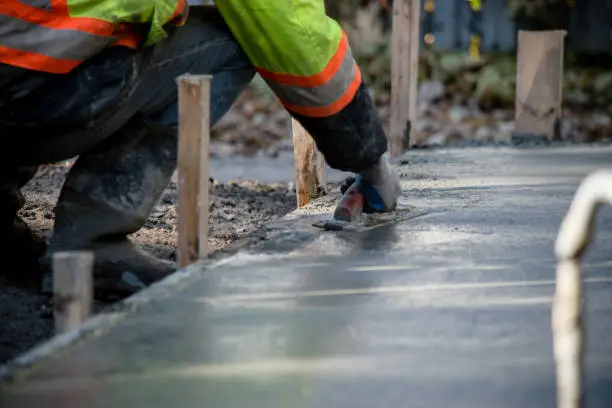
- Step 8: Floating and Troweling
During Concrete Slab Construction, the surface is smoothed using a bull float to bring the cement paste to the top. After initial placement, the slab is finished carefully to achieve a professional, smooth, durable, and visually appealing surface.
- Step 9: Control Joints and Edging
In Concrete Slab Construction, control joints are cut using a grooving tool to manage shrinkage and prevent cracking. The slab edges can be finished with an edger to create rounded, clean edges, enhancing both the appearance and durability of the garage floor.
- Step 10: Curing the Concrete
During Concrete Slab Construction, it is important to keep the concrete moist for 5–7 days using plastic sheets or curing compounds. Proper curing ensures the slab gains maximum strength, minimizes cracking, and results in a strong, durable garage floor.
- Step 11: Last Inspection and Clean-up
Carry out a comprehensive check on the slab on its levelness, smoothness and proper location of the joints. Take the forms off, clean up the site, and check to make sure that the garage floor is prepared to allow use of the vehicles or other finishing processes.
Conclusion
The benefit of a concrete garage slab is that it is strong, durable, and has a smooth and usable surface over the years. With the help of professional procedures, such as preparation, reinforcement, pouring, finishing, and curing, we promise that the property owners will have a safe, stable, and attractive floor, and you will have peace of mind and little maintenance in the long run and a garage floor that can withstand everyday use and the stresses of the environment.
FAQs
What is the best thickness of a garage concrete slab?
Usually 4-6 inches on regular cars, heavier in case of heavy carrying.
Is it necessary to reinforce the slab?
Yes, rebar or steel wires prohibit cracking and reinforcing.
How long does it take to cure concrete?
Light use of concrete takes a time of 5-7 days to cure, with full strength obtained after 28 days.
Do I need a vapor barrier under a concrete garage slab?
Yes, a vapor barrier prevents moisture from seeping up through the slab. This protects flooring and reduces mold or mildew issues.
Can I pour a concrete slab over an existing floor?
Yes, if the existing floor is stable and level. However, cracks or structural issues should be repaired before pouring new concrete.